AGMS Gateway User Management
Gateway Administrators can manage and control the access of their users in the AGMS Gateway's Manage Users section. Limits can be set by user to restrict access to only specific areas of the gateway, and to designate which transaction types are available.
We recommend setting up a dedicated user for each individual, app, or service logging in or connecting to the AGMS Gateway API. As general best practice, configure each user with only the specific permissions and transaction types needed to minimize risk if credentials were compromised.
User Access Management Key Benefits
- Unique user login credentials
- Add/Edit user information
- Reset user passwords
- Deactivate users
- Disable users
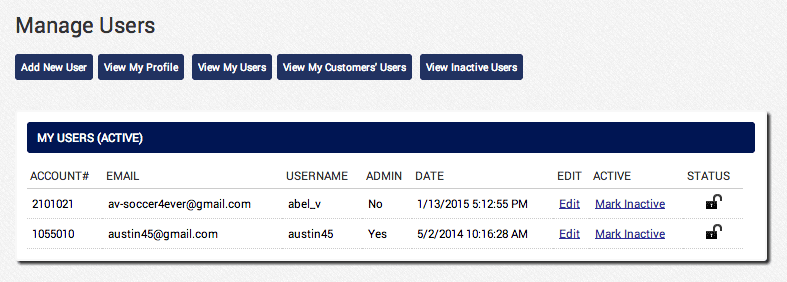
- View users by account number, email, username, admin, or date/time a user was created
- View all inactive users
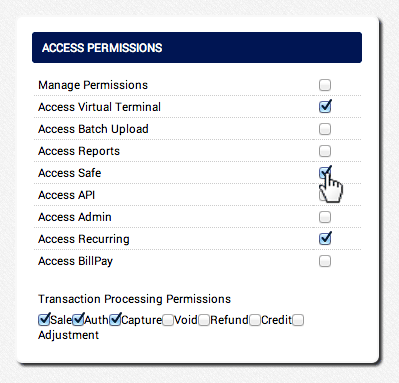
Access Permissions
| Permission | Description |
|---|---|
| Manage Permissions | Ability to manage all users' access permissions. |
| Access Virtual Terminal | Ability to access and run transactions on the Virtual Terminal. |
| Access Batch Upload | Ability to use the Batch Upload tool. |
| Access Reports | Ability to access and run all AGMS Gateway reports. |
| Access Safe | Ability to access the Customer SAFE. |
| Access API | Ability to access and use the AGMS Gateway API. |
| Access Admin | Ability to access the Merchant Configuration settings. |
| Access Recurring | Ability to access, setup, and modify Recurring Billing. |
| Access BillPay | Ability to access and use the BillPay tool, also known as Online Invoicing. |
| Sale | Ability to run a Sale. |
| Auth | Ability to run an Authorization. |
| Capture | Ability to run a Capture. |
| Void | Ability to run a Void. |
| Refund | Ability to run a Refund. |
| Credit | Ability to run a Credit. |
| Adjustment | Ability to make an Adjustment. |
Add New User
The steps below walk through how to create a new user and set their access permissions for the AGMS Gateway.
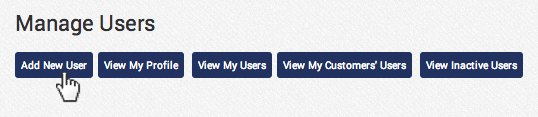
- In the User Management section of the AGMS Gateway, click Add New User
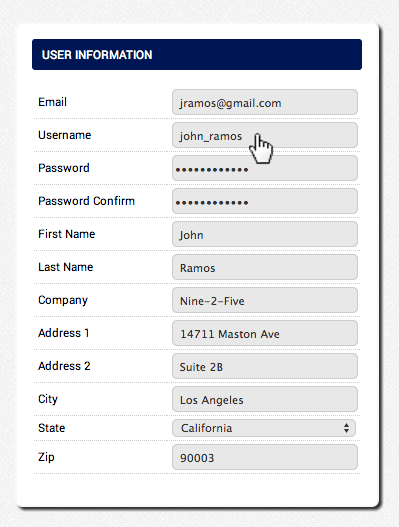
- Enter in the User's Information
- Set the user's Access Permissions
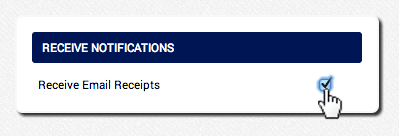
- To receive email receipts for the user, check Receive Email Receipts
- Click Submit to generate a welcome email sent to the user with their login credentials